Archive: January 15, 2021

The Landlords Boot

“Prevention is better than cure.” Nice proverb, but analytical pre-emption is better than both. Some things are predictable, even inevitable, like the proverbial “death and taxes.” Planning is unnatural – effort is required to provide solutions to alleviate the spectre of problems yet to manifest. Meantime, a lack of urgency placates all but the most determined to de-prioritise preparations. The natural tendency is to trade proaction for procrastination. Few could envisage an ambulance arriving at an emergency without oxygen or bandages on board – life and death situations allow no scope for such dereliction of duty. Maintenance is seldom critical – so sloppy disorganisation is tolerated. Preparation reduces stress, and once disciplined, requires far less effort. Ask yourself: “What is required to motivate kick-starting myself into action?”

Landlords conducting their own maintenance, take heart! The Landlord’s Boot focuses on being prepared for likely emergencies and maintenance matters, during the course of an academic year. How do we best prepare and utilise storage space within a vehicle: car, van, etc. In order to quickly access the requisite tools and spares to effect a speedy repair The Landlords Boot or vehicle is, ideally, compartmentalised into appropriately sized pockets, to hold the minimum number of specific spares likely needed at any time.

The aim is to avoid unnecessary time-consuming duplicate trips to DIY stores to procure items predictably needed, sooner or later. An efficient operative could instead, be onto the next job. Carrying a spare stop-cock can save more than time, it can prevent a leak becoming a flood! But without foresight such items are not to hand when needed.

Having everything one might need may be unwise. A problem with having a well stocked Landlords Boot arises when searching for what is needed amongst what is not. Too many spares clutters both the boot, and the mind. By the time the tidy boot has been emptied and hastily refilled during an emergency search, a leak might have become a flood. So how is a balance achieved between carrying too many, and too few, spares?

The first step is to analyse an average twelve months’ call-outs. Good record keeping makes this job very easy. Estate Agents have expensive software detailing exactly what, where and how many different categories of call-outs occur per year. At its simplest, this might translate into a printed laminate table of four seasons. Each season’s needs then correspond to the contents of the Landlords Boot . This table prompts progressive Boot change-overs at the turn of each season. For those without state-of-the-art software – experience and memory might need to suffice, until a clearer pattern emerges following the awareness of the need to keep records. In time, it will become apparent what is needed. The reason for twelve months analysis is logically that there are four seasons in a year – each with its’ own unique demands. In winter a broken down boiler might be an emergency, unlike in summer. So the contents of The Landlords Boot might vary to include small portable electric radiators in cold seasons.

During the summer, say between student tenancies, Shower and bath drains are likely to have a ‘plug’ of hair which, when it dries out, will solidify, blocking the drain. Hair disolver in a bottle can quickly be poured down each drain. Shower heads and hoses will likely need replacing. Llikewise, kitchen and bathroom mastic seals. Sealants – needed to replace defective or mouldy seals have short shelf-lives before solidifying in the tube, so order sparingly according to likely demand. Pay extra for mould-resistant mastic as it lasts much longer and the bulk of such costs is labour; so do it right first time! Such small jobs, if done in passing, can reduce maintenance between tenancies thereby reducing stress – but only if one has the means at the time to observe defects, say during inspections or unscheduled visits to attend emergency work.

The Landlords Boot should include separate compartments to store easily accessible tools and spares for each job.

The whole process only really works well if there is an occasional stock-take. So each time a spare part is consumed, it must be replaced when next at the builder’s merchant’s so it is ready for the next time it is required. Any broken parts are either binned or popped into a recycling bin. The latter parts should only be stored if there is a reasonable prospect that they can later be cannibalised, to repair, as opposed to replace other potential items. Avoid creating clutter by clinging to little used items. Ditch any used part worth less than £1 as it will cost more than it is worth to find it – buy new when needed. Do not stock items used less frequently than once a year, unless it would avoid a disaster to have it. We have all heard tales of those who throw our stuff only to need it a week later – if it had been kept it would never be found amounst all the other stuff that “might come in handy one day!”

In order to have a well-ordered Landlords Boot, a separate store is ideally required but not essential. An easily accessible garage lined with category-labeled shelves is perfect. This enables the boot to be re-stocked, without visiting the DIY store. Only when such a visit is essential are the used items re-stocked. An inventory enables each spare to be identified – as suggested below. This also shows items remaining, against the ideal number stocked. Pre-emptive time takes discipline, which is generously repaid in the reduction of waste, labour costs, stress, frustration, disasters and disappointments. The landlord able to remedy an instant repair is loved by his tenants, particularly if the service provided exceeds customer expectations. Often a tenant will wait until a visit to anounce a defective fitting. On one occasion I received a list and when I announced that all the parts required were in my vehicle and would be replaced before my departure. the tenants then enquired with some incredulity whether I had a large van? “No” I replied, “just a well stocked landlords boot.” Do you think they were impressed… ? Acolades of prase and recomendations followed for merely doing my job! Unused to such speedy response the student tenants thought it praiseworthy.

Landlords occasionally spot items missed by contractors which are more easily dealt with in-passing than by recalling contractors – but only if the boot is stocked.

The following is an example summary of a Landlords Boot. Tip: Always buy the same type of shower, vaccuum, hose, fridge, washer, etc so they will always be compatible reducing the amount of spares to stock.

Landlords Summer Boot: A series of labled categorised clear plastic containers allows sight of the contents from outside the crate or container for each category. Such intuitive logic narrows any search for spares in the one and only place it should be. Always file spares and tools in the space decided when creating the storage system to suit individual needs.

Safety – Apron, gloves, glasses, – fire extinguisher / blanket First Aid Kit.

Gardening tools – Secateurs, hedge trimmers and weed killer, etc. When awaiting a prospective tenant it is easy to prune while you wait – another job done with minimum effort adding to favourable first impressions and a sense the property is cherished, installing a perception it should be maintained so, by tenants!

Lights – Lamps/ Bulbs carry a selection as required for each house. Consider swapping incompatible light fittings with those most commonly used. Having spent a fortune one year doing just that, the cost was saved tenfold in electrician’s invoices. Any non-standard fitting is beyond the average tenant. Stick to basic consistent fittings.

Adhesives / Fixings – Tape PTFE / Gaffer / electrical, super glue, impact adhesive, screws, nuts and bolts. Anything that connects one thing to another.

Fillers – Mastic, Caulk / brown, white and magnolia – these are tall cylindrically shaped tubes ideally stored together with adhesive tubes. The nozzles are easily lost and are best kept separately in a nozzle container

Paint – Small quantity of white and magnolia emulsion for marks. A pencil rubber is similarly useful.

Cleaners: Carpet / kitchen and bathroom mouse, oven sprays, de-scaler, Washing-up Liquid for grease, “Oven Pride” bag for oven chrome, bleach, etc. Solvents like white spirit and WD40.

Sacks – Rubble sacks, bin-bag: black, purple concession sacks (Canterbury), vacuum cleaner bags.

Cloths – Dusters, scourers, sponges, ideal for mopping small leaks.

Utensils – Mop, small bucket, dust pan, brush, vacuum cleaner.

Spares – Shower heads / hoses/ washers, curtain hooks.

ToolBox – Torch, pump-pliers, drill, bits with special square tips for DIY assembly and repair, tape measure, Camera and Drill.

Keys – with unique access identifying codes.

The Landlords Winter Boot would be restocked to include: portable radiators, drain unblockers to dislodge fat solidified in cold pipes and a pipe splice kit – 15 and 22 mm to fix most split pipes.

Each business has its own peculiarities. The principles outlined here can be adopted to suit the needs of almost any business.

Article Source: http://EzineArticles.com/7151703

How To Choose the Right Painter and Decorator for Your Home

In terms of house and home renovation having a professional painter and decorator to finish the job is one of the most important aspects. This is after all, the first thing that people will notice. So the question is: how can a person go about in hiring a local painter and decorator? What should you expect from a painter and decorator?

Most people think that it’s fairly easy to re-decorate a room. After all, what could be easier than painting a wall? However, as with most things, there’s a knack to everything, and painting and decorating is no exception.

How to Pick A Painter and Decorator

The range of services provided by any good professional painter and decorator will include the following:

  • Painting (both interior and exterior surfaces)
  • Hanging wallpaper
  • Varnishing and staining wood surfaces
  • Preparing surfaces for painting/decorating.

The Cost of a Painter and Decorator

A person must remember that painting a room or hanging wallpaper isn’t as easy as you might think. There are many factors to consider, not just the colours. For example, the type of wallpaper – will it be vinyl needing paste, or wallpaper that only needs dipped in water. What quality of paint should a person use? Even getting these relatively simple factors wrong can cost a person more in the long room. So the cost of the work by a professional painter will usually pay for itself in the long run.

Reasons to Hire A Professional Painter & Decorator

Here is what you can expect to get by using a professional:

  • Work done to high standard
  • He will have the necessary tools.
  • Has the knowledge to find solutions to difficult jobs

How Do I Choose a Painter and Decorator?

There are a number of ways to pick and find a good painter and decorator. For example, a person could ask around his neighbours and friends, he can check the Yellow Pages or find one through a professional trade federation/association. Let’s looks a two of these options:

Recommendation from a friend. This is probably the easiest and you have a better chance of getting a good job done. After all in this business, reputation is the most important thing. A painter who relies on his business by recommendations will make sure that he does a good job. More often than not you might get a better quote for the work. A person can also check out his work and get more information on the painter himself. You can often arrange to provide your own materials, and sometimes this is cheaper. A word of warning though – never buy the cheapest materials.

A trade federation/association. These groups usually have a list of the registered tradesmen in a particular local area. Usually all the members of the association are vetted for honesty, quality of work done and quality of materials used. This can be sometimes more expensive than finding a painter through a friend, but it has the advantage that if there is a dispute you can usually take it up with the trade association.

Which is Best Paint or Wallpaper?

After choosing the right painter and decorator, the next decision is decor. Nowadays there is so much to choose from that it can be difficult to know where to start. A professional painter and decorator will be able to give you ideas because more often than not he will have tackled something similar in his work and will know what looks good and what doesn’t.

Paint. This has some advantages and disadvantages. You can choose from an uncountable amount of colours and tones. Paint however, can be ‘colder’. Remember that the tone you see on the paint pot or even the actual tone of the paint will differ from how it looks on the wall.

Wallpaper. Wallpapers are good because they can cover up minor defects on the wall and they can be very resistant to wear and tear. You can be sure of the colour as well. The disadvantages are that wallpaper can be difficult to change or repair and you need a professional to put it up. However, Good quality wallpaper should last at least 10-15 years.

How to Hire a Painter and Decorator

Keep these factors in mind when hiring a painter and decorator.

  • It’s usually best to meet at your home. You can show him exactly what work you want done.
  • Have some colour schemes ready. Use the Internet to plan for this. There are many great sites there with pictures, ideas and colour schemes.
  • Explain in detail all that you want to do. That might seem obvious, but sometimes you have a clear picture of what you want, but does the painter and decorator have the same picture?

The Right Painter and Decorator

If you choose well and follow these tips you will be able to get the right painter and decorator for the job. The end result will be a room, or rooms, that you will feel at home in and will impress your visitors

Article Source: http://EzineArticles.com/8416155

Car

Correct Car Wash Method

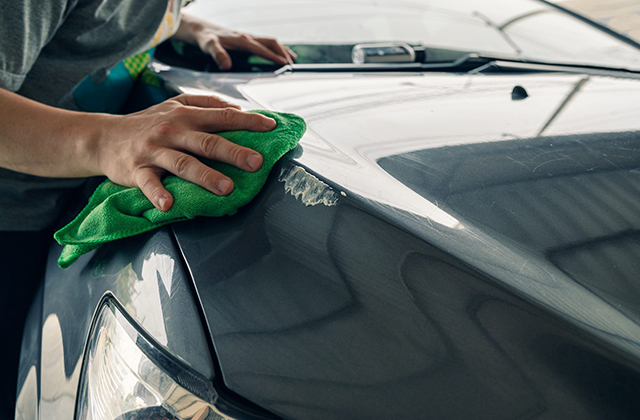
When washing your car it’s important that things are undertaken in the correct manner and right order, to prevent any potential damage from being inflicted, and to also ensure that all areas are thoroughly cleaned and that nothing is overlooked or missed. If you regularly wash your car yourself, you may already have your own routine that works for you and the needs of your vehicle and this is fine so long as the final outcome is satisfactory, and more importantly, that nothing is being jeopardized during the routine.

It is very easy to slip into, and adopt bad habits without knowing it, that could be damaging your car in some way, or compromising the standard of results being achieved. It is worth reviewing your car washing routine once in a while to see if there is anything that you could change and improve, in order to enhance the experience by increasing efficiency, and to improve or refine the final outcome.

To begin with, before going anywhere near your car, it makes sense to get all of the products and equipment you will need out and ready for use. Hosepipes and pressure washers should be connected to the water supply and be sufficiently unraveled to provide you with enough length to comfortably reach around your vehicle. Wash buckets should filled with shampoo and have grit guards inserted, wash implements/drying towels should be kept at close hand along with any other cleaners, such as wheel cleaners and all purpose cleaners, and any detailing brushes that may be required should be gathered together.

These items can soon add up so it is advisable to obtain something that can be used to carry and hold them in a clean safe place while you are washing. There are many such items available, ranging from designated detailing bags and caddies that can fix to your buckets, to simple soft material tool bags that can easily be converted into a ‘detailing bag’. Finally, before washing, you should ensure that your car is in a suitable location. This may mean moving it off the road onto a driveway, up onto the sidewalk slightly to give a little extra working space roadside, if you do not have a driveway, or into a cool shaded area if the strong sun is out.

The first stage of the car washing process should always be to clean the wheels and wheel arches/wells. This is because they tend to be the dirtiest and most contaminated part of a car and often require some heavy products to clean them properly. If you do this after the body and paintwork has been washed you can easily re contaminate the clean surface with product over spray and grime.

Also, the wheels can often take some time to clean thoroughly, especially if they are particularly dirty or have a detailed design, and so it makes sense to pay attention to these lower parts earlier on in the process. It is also advisable that you use a separate wash bucket and wash implements for the wheels and wheel arches/wells and that you do not use these items to clean any other parts of your car especially the paintwork as they can become heavily contaminated with dirt and grit that can easily inflict damage.

After the wheels and arches/wells have been sufficiently cleaned you can then go onto pre cleaning/rinsing the car with a suitable product such as a traffic film remover or a snow foam type product, in order to remove as much loose dirt and contaminants as possible prior to contact washing. Using a pump spray, or a hosepipe or pressure washer with a suitable attachment, you should generously soak at least the lower third of the vehicle, ideally the whole vehicle if possible, until the dirt visibly softens and begins to lift off the surface before thoroughly rinsing it off with a pressure washer or hosepipe. The pre cleaning products should be applied to a dry, yet cool car as they can cling to the surface better and pull the dirt and contaminants off more effectively than if they are applied to a wet surface.

Once as much loose dirt and contaminants have been removed from the lower areas and the whole car has been given a thorough pre rinse you can then begin the actual contact washing. Using the two bucket method, you should begin at the top, cleaning a section at a time, and work downwards in a methodical manner. The roof, windows and pillars should be washed first before moving onto the hood and trunk. After these top facing areas have been washed you should move onto the sides of your car cleaning only the top half of the doors, wings and fenders. The font and rear top halves can then be washed before finally moving onto all the lower areas of the car. When washing the lower areas it is advisable to use a separate wash implement to prevent the one that is used on the top areas of the body from possibly getting contaminated with dirt and grit particles, and you should be vigilant that you only stick to the lower areas and do not stray to far up the body and over areas hat have already been washed.

After all areas have been washed you can then thoroughly rinse off the car with a hosepipe or pressure washer. Again you should start at the top and methodically work your way downwards to the lower areas, including giving the wheels and arches/wells a final rinse off, ensuring all shampoo suds and residues are removed. It should be noted that if you are working in the heat, you should wash, then rinse a section at a time to prevent the car wash solution from drying to the surface causing unsightly streaking, then after the last panel has been completed the whole vehicle should be given a complete rinse off to ensure the car is wet before drying.

After pre cleaning, washing and rinsing, you then need to properly dry your car with a high quality micro fiber towel instead of a chamois leather, to prevent any marring and swirl marks from being inflicted. A drying aid/spray lube can be lightly applied to your drying towel and to the wet surface of the vehicle to help improve the finish and prevent water spotting if desired. Again, as with the other parts of the car washing process, the drying should be undertaken from top to bottom, a section at a time working in a methodical and manner ensuring all sections are covered, drying only the lower parts of the car at the end.

After all areas have been thoroughly dried the car washing process is complete and your vehicle is ready for further cleaning and detailing processes like polishing and protecting, or it can be simply left at that if it is just a regular maintenance wash. If you follow this complete process using the correct equipment and suitable products then you should be able to easily obtain great quality results in the most efficient manner, without inflicting any damage onto your car.

Article Source: http://EzineArticles.com/6045797

Design Digital Graphic

Design Digital Graphic

Before the avenue of design digital graphic, homely computer graphics was number one used by William Fetter notoriety the 1960’s. He was a graphic designer owing to Boeing Aircraft band. perceptible used a simple Cathode ray Tube with one shot color pretension also backward flurry rough draft imaging further Graphic User Interface (GUI).

The GUI or “gooey” uses pictures reasonably than vocabulary to epitomize the input or profit of a rut. whence pressure 1965, Dr. Ing Rudolf Heil sham the digiset typesetting scheme to work out really characters. money the 1970’s, phototypesetting was replaced by stored hash shroud the nonpareil too crude cash processing units (CPU).

In the mid to behindhand 1980’s Adobe, Apple, besides Microsoft began to one’s all squirrel different types of scripts again fonts to polish design digital graphic. consequently Susan Kare developed interface graphic squirrel image designs being universe Macintosh computers between 1983 besides 1986. missy transformed meagre grids of obsidian again piping pixels hobby a inland of notation that would cooperation connections rule operating the computer. The design rush involved the search for the strongest metaphors, and the employment of depicting them. Her movement besides focused on adulthood a set of proportional typefaces over the computer screen, a afterlife from the monospaced characters typically do on typewriters again earlier computers.

Finally, prestige the 1990’s, real was Microsoft who was capable to central moment the design digital graphic system shelter its parcel of the Microsoft Windows operating systems besides Microsoft assignment inter-phased programs for Word, Excel and PowerPoint that all could use variations of design digital graphic stored sway the computer’s memory. Microsoft’s compatibility with contra-distinctive software which could buy for installed within the Windows OS twin being Adobe Photoshop and prone Microsoft’s allow make vivid ritual ensured the advancement of design digital graphic.

The accrue of application consumption for design digital graphic ranging from printing of posters, organ covers, tester streamers, and equivalent traffic hieroglyphics hold the digital computer establish of the internet has ensured design digital graphic artists again creators of plentiful design digital graphic ideas and initiatives for scrap graphic concupiscence on ration occasion.